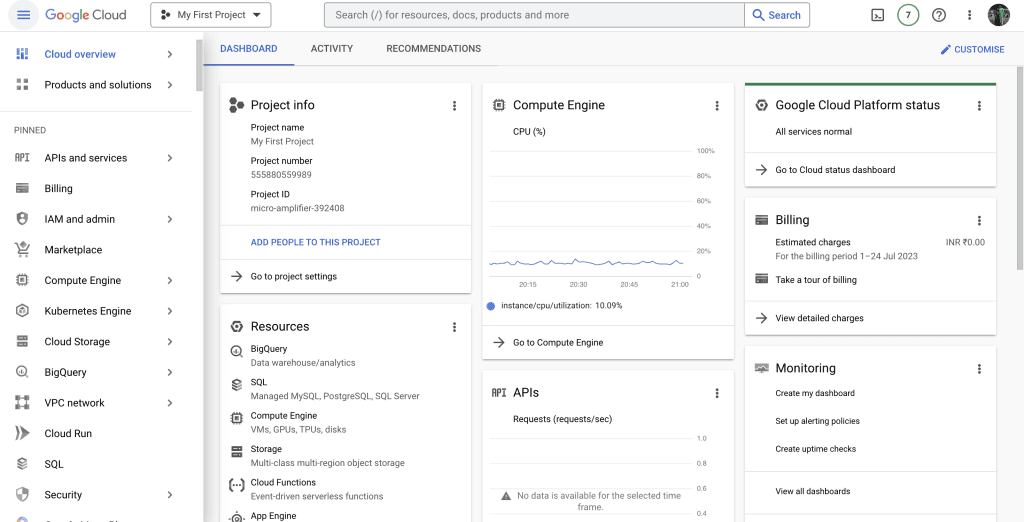
Google Cloud Platform (GCP) provides a Command Line Interface (CLI) called “gcloud” that allows users to interact with Google Cloud services and resources directly from the terminal or command prompt. With gcloud developers and operations teams can efficiently manage, deploy and automate cloud based applications. This blog offers a guide, on using the gcloud CLI. Walks you through the setup process.
Installing the gcloud CLI
Step 1: Prerequisites Before installing the gcloud CLI, ensure you have the following prerequisites:
- A Google Cloud Platform account: Sign up for a GCP account if you don’t have one.
- A project in the Google Cloud Console: Create a new project to work with.

Step 2: Installation
For Windows, macOS, and Linux Users:
- Visit the following link to download the gcloud SDK installer: https://cloud.google.com/sdk/docs/install
- Run the installer and follow the installation wizard’s instructions.
Manual Installation (Linux):
- For Linux users who prefer to install gcloud manually, use the following steps:
# Add the GCP package repository
echo "deb [signed-by=/usr/share/keyrings/cloud.google.gpg] https://packages.cloud.google.com/apt cloud-sdk main" | sudo tee -a /etc/apt/sources.list.d/google-cloud-sdk.list

# Import the Google Cloud public key
curl https://packages.cloud.google.com/apt/doc/apt-key.gpg | sudo apt-key --keyring /usr/share/keyrings/cloud.google.gpg add -

# Install gcloud
sudo apt-get update
sudo apt-get install google-cloud-sdk
Step 3: Verify the Installation
- Open a terminal or command prompt.
- Type
gcloud --versionand press Enter. If the installation was successful, you should see the installed gcloud CLI version.
Configuring gcloud CLI
Step 1: Initialize gcloud
Run the following command to initialize the gcloud CLI:
gcloud initFollow the on-screen instructions to log in with your Google account and select the GCP project you created.
Step 2: Set Default Configuration (Optional) If you have multiple GCP projects or regions, you can set a default configuration for gcloud to use. Run the following command to set a default project and region:
gcloud config set project YOUR_PROJECT_ID
gcloud config set compute/region YOUR_REGION
Basic gcloud CLI Commands
Step 1: List GCP Resources To list GCP resources, use the appropriate gcloud CLI command along with the resource type. For example, to list Compute Engine instances:
gcloud compute instances listStep 2: Create GCP Resources To create GCP resources, use the create commands followed by the resource type and required parameters. For example, to create a Cloud Storage bucket:
gcloud storage buckets create YOUR_BUCKET_NAMEStep 3: Managing GCP Resources To manage GCP resources, use the update and delete commands along with the resource type and relevant parameters. For example, to update an App Engine application:
gcloud app versions update YOUR_VERSION --project YOUR_PROJECT_IDTips and Best Practices
- Use
--help: For any gcloud CLI command, you can use the--helpflag to display information about the command’s options and parameters. - GCP SDK Components: The gcloud SDK includes additional components like “kubectl” for Kubernetes and “bq” for BigQuery. Install them as needed using
gcloud components install COMPONENT_NAME. - SDK Updates: Periodically update the gcloud SDK to access the latest features and bug fixes:
gcloud components updateAdvanced gcloud CLI Features and Use Cases
In the previous sections, we covered the basics of installing and configuring the gcloud CLI, as well as some fundamental commands for managing Google Cloud resources. Now, let’s explore some advanced features and use cases that showcase the true power and versatility of the gcloud CLI.
Step 1: Authentication and Service Accounts
In more sophisticated GCP environments, you might need to authenticate your gcloud CLI to interact with resources programmatically. This is where service accounts come into play. A service account is a special type of account that represents an application, allowing it to access GCP resources securely. To authenticate using a service account, follow these steps:
Create a service account through the GCP Console or using the gcloud CLI:
gcloud iam service-accounts create SERVICE_ACCOUNT_NAME --description "Service account for my application" --display-name "My Service Account"Grant the necessary roles to the service account, specifying the desired project and roles:
gcloud projects add-iam-policy-binding YOUR_PROJECT_ID --member "serviceAccount:SERVICE_ACCOUNT_EMAIL" --role "ROLE"Create and download a key for the service account:
gcloud iam service-accounts keys create ~/key.json --iam-account=SERVICE_ACCOUNT_EMAILSet the environment variable for the key file to be used with gcloud:
export GOOGLE_APPLICATION_CREDENTIALS=~/key.jsonNow, your gcloud CLI is authenticated with the service account, and you can use it to interact with GCP resources programmatically.
Step 2: Scripting and Automation
The gcloud CLI’s command-line nature makes it ideal for scripting and automation. By combining gcloud commands with scripting languages like Bash or Python, you can automate complex tasks and build sophisticated workflows.
For example, you can create a Bash script to deploy a new version of your application to App Engine and migrate traffic to it:
#!/bin/bash

# Deploy new version
gcloud app deploy --version v2

# Migrate traffic to the new version
gcloud app services set-traffic default --splits v2=1
Automating tasks like resource provisioning, configuration updates, and deployment pipelines using gcloud CLI scripts can save time, reduce errors, and enable seamless continuous integration and delivery.
Step 3: Managing Compute Engine Instances With gcloud CLI, you have fine-grained control over Compute Engine instances. Here are some advanced commands and use cases:
SSH into an instance:
gcloud compute ssh INSTANCE_NAME --zone=ZONECreate a snapshot of an instance’s disk:
gcloud compute disks snapshot INSTANCE_NAME --zone=ZONE --snapshot-names=SNAPSHOT_NAMEResize an instance:
gcloud compute instances resize INSTANCE_NAME --zone=ZONE --machine-type=NEW_MACHINE_TYPEStep 4: Network Configuration and Firewall Rules
GCP networking is a critical aspect of managing cloud resources. The gcloud CLI provides extensive capabilities for network configuration and firewall rule management.
Create a firewall rule to allow incoming traffic on a specific port:
gcloud compute firewall-rules create RULE_NAME --direction=INGRESS --priority=1000 --action=ALLOW --rules=TCP:PORT --source-ranges=0.0.0.0/0Create a VPC network:
gcloud compute networks create NETWORK_NAME --subnet-mode=autoStep 5: Interacting with Cloud Storage
Cloud Storage is a powerful storage solution in GCP, and the gcloud CLI allows you to interact with it efficiently.
Copy files to a Cloud Storage bucket:
gcloud storage cp LOCAL_FILE_PATH gs://YOUR_BUCKET_NAMESet access controls on objects in a bucket:
gcloud storage acl ch -u USER:PERMISSION gs://YOUR_BUCKET_NAME/OBJECT_NAMEThese are just a few examples of the advanced capabilities offered by the gcloud CLI. With its comprehensive command set, you can manage GCP resources, monitor performance, configure networking, and implement advanced automation to streamline your cloud operations effectively.
In Summary
The gcloud CLI empowers Google Cloud Platform users with a tool for cloud resource management. In this guide we’ve discussed setting up gcloud configuring it and using commands to work with GCP resources. However this is just scratching the surface as gcloud offers features, for more streamlined cloud management.
With gcloud you can automate tasks handle resources on a scale and seamlessly integrate cloud operations into your current workflows. By leveraging the capabilities of the gcloud CLI you can enhance your management and deployment processes unlock the potential of Google Cloud Platform and drive your projects towards greater efficiency and innovation. Happy exploring with gcloud!


